
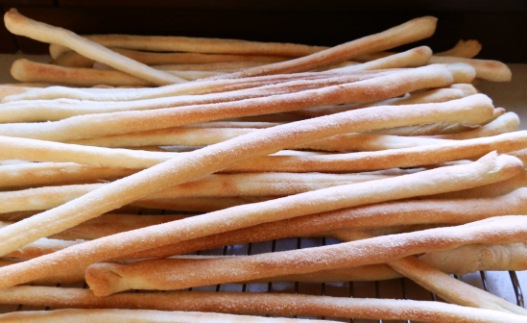
On our walking tour in Piedmont, we often dine at restaurants that place yard-long grissini – breadsticks – in the middle of the table, which are a great conversation piece as well as being a delectable start of a meal. Local bakeries advertise grissini that are stirati a mano – hand stretched. They are delicious crunchy batons, with a rustic uneven appearance coming from the hand-stretched process. But where did they originate?
The traditional bread of Piedmont in the 17th century was called ghersa, which was a long baguette-shaped bread with a soft, doughy interior that often caused indigestion.
The young Duke of Savoy, Vittorio Amedeo II, was prone to illness and particularly intestinal upsets that contributed to his weak, frail nature. During a serious bout of illness, his mother called the court’s doctor, Don Baldo Pecchio, for an urgent consultation. Coincidentally, the doctor had suffered from the same ills as a child, and had been cured by only eating bread that was “well-risen, thoroughly baked with only a bit of soft interior, and very crispy.” Doctor Pecchio had the court’s baker take the dough from the normal ghersa bread, and cut it into narrow pieces, then stretch the dough until it was a long thin strip, and bake it until it was crispy. The grissino was born!

The grissino diet worked wonders, and Vittorio Amedeo II grew to be a healthy adult, who went on to become the first king of the house of Savoy. It is said that his ghost is still seen in the former royal palace, clutching a breadstick in one hand.
Personally, after leading a walking tour in Piedmont with plenty of munching on grissini, I dearly missed them, and decided to try my hand at making breadsticks at home with the breadstick recipe below. Since then, family members often beg me to make them, and these crispy grissini are often gobbled up before we sit down to dine. The length of the grissini will be determined by how large your oven is – if you have a wide spacious oven (unlike me!) you can really impress your friends with very long breadsticks.
Besides stretching the dough into long strips, you can vary the shape, tying them into a bow, making them into a zig-zag, or twisting them together. They make a nice hostess gift, too.

Here’s the recipe for breadsticks from Piedmont adapted from an excellent source in Italian, giallozafferano.
Italian Breadstick Recipe – Grissini from Piedmont
Ingredients
- 500 grams (3 ¾ cups) Flour
- 1½ tsp Salt
- 250 ml (approx 1 cup) Warm Water
- 15 gr ( ½ oz.) Fresh Yeast
- 1 tsp. Honey
- 50 gram (about 2 oz.) plus extra for brushing on dough Olive OIl
- 1-2 TB Semolina Flour
Cooking Directions
- Pour about 3 TB of the warm water into a small cup, add the honey and stir until blended.
- Crumble the yeast into the honey mixture and stir.
- Let yeast mixture sit until it puffs up.
- In a large bowl, mix together the flour and salt.
- Add the water and yeast mixture and begin to stir.
- As you are stirring, add the oil in a stream.
- Once the dough is thoroughly mixed together, add a bit more water if too dry.
- Place the dough on a wooden board and knead until you have a soft dought that is smooth and elastic (you may also mix and knead these ingredients in a mixer with a dough hook.)
- Sprinkle semolina flour on a large cutting board.
- Form the dough into a rectangle and place on the floured board.
- Brush the rectangle of dough with olive oil, including the sides of the dough, and dust with semolina flour.
- Place the dough, uncovered, in a warm place, until doubled in size, about 1 hr.
- Heat the oven to 200° C (390° F).
- Cover baking sheets or cookie pans with baking parchment paper.
- With a large, straight edged knife, cut the dough on the short side of the rectangle into a thin strip about 1 cm (½”) wide.
- Grasp the two ends of the dough strip with your fingers, and gently stretch it until it is the length of the baking pan, and place it on the parchment-lined pan.
- Repeat this process, leaving about 3 cm (1½”) between each grissino.
- Don’t worry if they are not identical, that is a part of their look!
- Bake 15-20 minutes until golden, and place on rack to cool.
- The irregular shape is characteristic of these hand-pulled grissini, with the thinnest parts being crunchier than the thicker parts, but they should be overall nice and crispy.
- If everyone doesn’t immediately gobble these up, store them in an airtight container to keep them from getting damp – a plastic bag works well, too, just make sure the breadsticks are completely cool first (if they do get damp and lose their crunch, you can revive them by placing them in a hot oven for a couple of minutes, being careful not to burn them.)
- Note: If you have a large oven with large baking sheets, cut the dough strips a bit thicker, and stretch them to the length of the pan.
- The longer the grissini, the more impact they will have on your guests, though the harder they are to store.
